Choose brake pads based on driving style and needs. Stock up on essential tools for DIY auto repairs. Remove old pad assemblies safely. Install new pads correctly, inspect rotors, and bleed brakes. Test brakes after replacement. Regularly inspect and maintain brakes for optimal performance.
“Looking to tackle a common yet crucial car maintenance task, like replacing your brake pads? This comprehensive guide is your go-to resource for successful DIY auto repairs. We’ll walk you through the entire process, from understanding different types of brake pads and gathering necessary tools to removing old assemblies and installing new ones. By following our step-by-step instructions, you’ll ensure optimal braking performance and safety.”
- Understanding Brake Pads: Function and Types
- Gathering Tools and Materials for Replacement
- Step-by-Step Guide to Removing Old Pad Assembly
- Installing New Brake Pads: Tips and Best Practices
- Testing and Adjusting Brakes Post-Replacement
Understanding Brake Pads: Function and Types
Brake pads are an essential component of your vehicle’s braking system, playing a crucial role in slowing and stopping the wheels. They work in conjunction with brake rotors to convert the kinetic energy of moving vehicles into heat, ensuring safe and controlled stops. Understanding the function and types of brake pads is key when considering DIY auto repairs.
There are primarily two types of brake pads: organic and metal. Organic pads, typically made from a blend of friction materials and rubber, offer superior comfort and reduced noise levels but may have shorter lifespans. Metal pads, on the other hand, are more durable and suitable for high-performance vehicles or those who frequently tow or carry heavy loads. When selecting brake pads for your vehicle, consider factors like driving style, environmental conditions, and the need for quiet operation versus superior stopping power.
Gathering Tools and Materials for Replacement

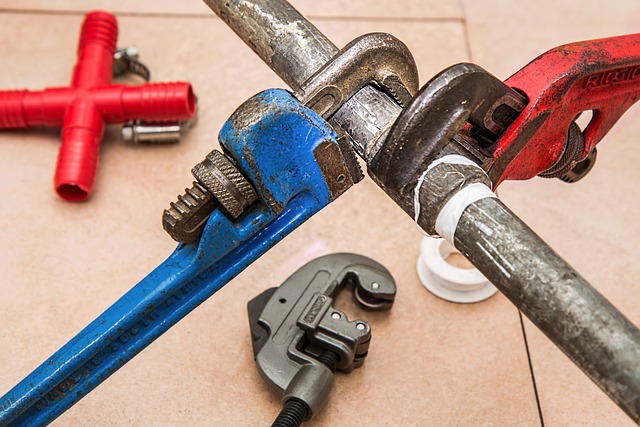
When undertaking a brake pad replacement, it’s essential to have the right tools and materials on hand. For a successful DIY auto repairs project, gather high-quality brake pads that are specifically designed for your vehicle make and model. Ensure you also have a jack, jack stands, socket sets (including metric and standard), a torque wrench, and safety gear, such as gloves and eye protection. While this might seem like a substantial list, having these essentials readily available will streamline the process, making it more manageable and safer for both you and your vehicle.
Remember that proper tools are crucial not just for ensuring a precise diy timing belt replacement guide, but also for tasks like replacing your car’s air filter or restoring old car interior components. Each of these repairs requires specific tools tailored to the job, so investing in a well-rounded set will enable you to tackle various maintenance and repair tasks down the line.
Step-by-Step Guide to Removing Old Pad Assembly

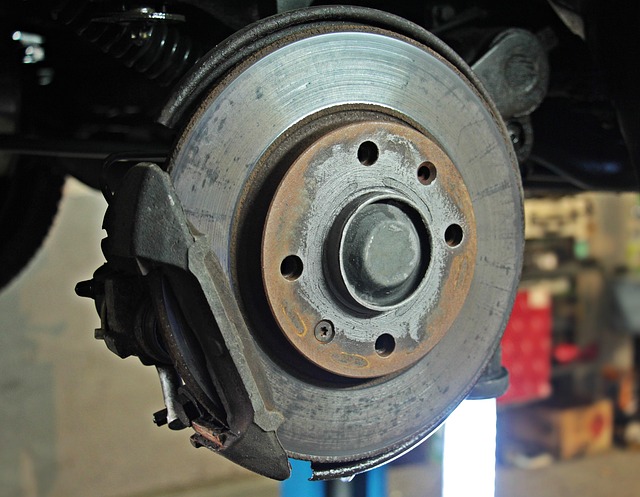
Removing the old pad assembly is a crucial step in any brake pad replacement DIY auto repairs project. Begin by lifting the vehicle safely and securing it on jack stands, ensuring stability and ease of access to the brakes. With the proper tools at hand—including a socket set, wrenches, and possibly a torque wrench—you can start disassembling. First, locate the calipers and identify their function in clamping the pads against the rotors. Next, carefully loosen and remove any bolts or pins holding the caliper in place, taking note of their positions for reinstallation.
Once the calipers are detached, it’s time to tackle the old pad assembly. Use a pry tool or a special brake pad remover to break free the pads from the caliper pistons, being mindful of any springs or other components that might be involved in this process. With the old pads and hardware separated, inspect the rotor for damage or wear—a common task alongside diy fuel filter change or check engine light diagnostic checks—and ensure it’s in good condition before moving on to install the new brake pads, another essential aspect of regular vehicle maintenance, much like a diy coolant leak repair.
Installing New Brake Pads: Tips and Best Practices
When it comes to installing new brake pads, there are several tips and best practices to keep in mind for safe and effective DIY auto repairs. First, ensure that your vehicle is properly supported with jack stands before beginning any work on the brakes. This prevents unexpected movement during installation and enhances safety. Next, carefully remove the old brake pads by unscrewing or unbolting them from the brake calipers, taking note of their orientation for proper placement later.
Inspect the brake rotors for any signs of wear, corrosion, or damage. If they appear worn down, consider replacing them as well to ensure optimal braking performance and safety. Once the old pads are removed, slide in the new ones, ensuring they align correctly with the calipers. Tighten the pads securely but avoid over-tightening to prevent damage to the calipers or rotors. After installing the new brake pads, it’s essential to bleed the brakes to remove any air bubbles and ensure consistent braking force. This process can be done using a car brake bleeding DIY kit, similar to how you’d handle other DIY coolant leak repairs or even change oil yourself with proper tools and precautions.
Testing and Adjusting Brakes Post-Replacement
After successfully replacing your brake pads, it’s crucial to test and adjust your brakes to ensure optimal performance and safety. Begin by gently pressing the brake pedal several times to allow the new pads to bed properly. Listen for any unusual noises and feel for any vibrations or pulsing in the pedal – these could indicate issues with alignment or pad contact. Next, perform a road test, selecting a safe, open area away from heavy traffic. Gradually apply the brakes at varying speeds to assess their effectiveness and consistency.
Remember that safety is paramount when it comes to vehicle maintenance, so if you notice any concerns or hesitations during this process, consult a professional mechanic. Regularly inspecting and maintaining your brake system, including tasks like checking brake fluid levels and replacing worn components, will contribute to a smoother ride and extended life of your brakes, making DIY auto repairs like pad replacements a worthwhile endeavor for many vehicle owners.
For those considering tackling brake pad replacement themselves, this comprehensive tutorial serves as a valuable guide for successful DIY auto repairs. By understanding the different types of brake pads and following the step-by-step process outlined here, car owners can ensure their vehicle’s braking system is up to par. With the right tools and some basic knowledge, replacing brake pads becomes an achievable task that saves time and money while enhancing safety on the road.